When doing the new website for the Sublime Text 2.0 launch, instead of just screenshots, I wanted to have animations to demonstrate some of its features. One of the criteria was that the animations should work everywhere, from IE6 to an iPad. This ruled out two common video options, Flash and the <video> element. Animated GIF files would have been a candidate, except for two issues: the 256 color limitation, which would have made the animations ugly, and the encoders I tried spat out huge files, at almost 1MB per-animation.
Instead, I wrote a small Python script that takes a collection of PNG frames as input, and emits a single packed PNG file as output, which contains all the differences between the frames, and some JSON meta-data specifying which bits of the packed PNG file correspond to each frame. JavaScript turns the PNG and JSON into an animation, using either the canvas element, or emulating it using overlaid div elements for older browsers.
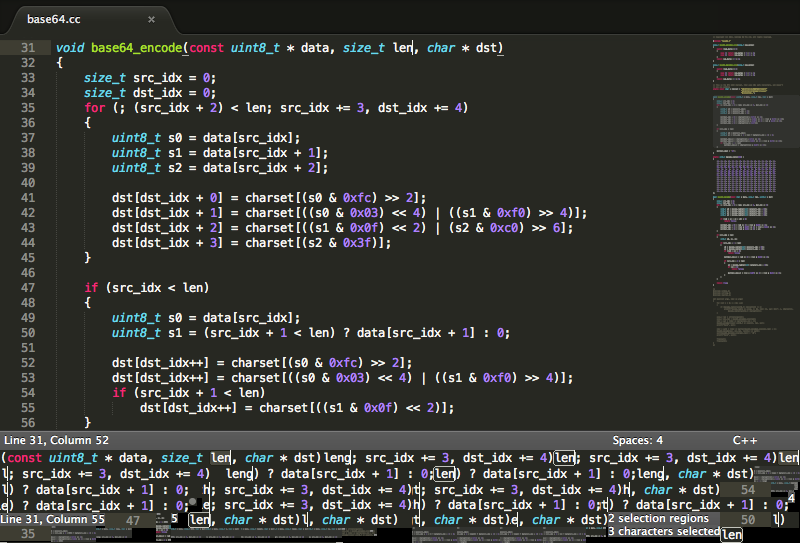
As a short example, this animation:
is packed into this PNG file:
The data size of the animation is 96KB for the packed image plus 725 bytes for the gzipped meta-data. This compares to 71KB for a static PNG of a single frame. Aside from the quality advantage over animated GIFS, doing the playback in JavaScript gives more control over the animation. This control is used on the Sublime Text website to synchronize text with the animation, and automatically cycle through the different animations.
The meta data looks like this:
timeline =
[
	{
		"delay":623,
		"blit":
		[
			[0,0,800,450,0,0]
		]
	},
	{
		"delay":182,
		"blit":
		[
			[0,450,322,16,182,40],
			[771,482,23,10,738,96],
			[720,527,23,16,244,100],
			[51,526,21,16,729,128],
			[586,527,20,10,738,196],
			...
		]
	},
	{
		"delay":194,
		"blit":
		[
			[0,526,51,15,0,100],
			[777,450,23,16,244,100],
			[794,488,4,2,738,104],
			[608,512,112,13,4,434]
		]
	},
	...
]
Each entry in the above timeline describes a frame of data. The delay attribute gives the number of milliseconds to show the frame for, and the blit attribute describes the image rectangles that have changed from the previous frame. This description uses 6 numbers, the first two give the offset within the packed image, then two numbers for the width and height of the rectangle, and then another pair of numbers for the destination position.
The JavaScript code to play the animation is quite short: the canvas version calls drawImage to draw each rectangle at the appropriate time, while the fallback version creates an absolutely positioned div element to represent each rectangle.
The Python encoder program puts quite a lot of effort into reducing the file size. For each frame, it first determines a set of rectangles that differ from the previous frame. Each of these rectangles is placed into the packed image, but first the packed image is exhaustively searched to see if the data already exists, in which case only meta-data is needed for the frame.
You can download the encoder from http://github.com/sublimehq/anim_encoder, under the permissive 3 clause BSD license. Keep in mind it was written as an essentially once off script, so it's not the easiest thing to work with.
anim_encoder.py has only been used on a Ubuntu system. It requires NumPy, SciPy and OpenCV, which are available via apt-get as python-numpy, python-scipy and python-opencv. It also assumes pngcrush is installed, and in the system path.
For input, you'll need to have a series of files named screen_([0-9]+).png. The number in the the filename is a timestamp in milliseconds for the frame. The absolute values of the timestamps aren't important, just the difference between them. For example:
example/screen_660305415.png
example/screen_660306038.png
example/screen_660306220.png
example/screen_660306414.png
example/screen_660306598.png
example/screen_660306790.png
example/screen_660307644.png
example/screen_660307810.png
example/screen_660307875.png
example/screen_660308049.png
example/screen_660308235.png
example/screen_660308285.png
example/screen_660309704.png
Then run the encoder via:
./anim_encoder.py example
It'll emit two files example_packed.png, and example_anim.js, containing the timeline.
Comments on Hacker News